How We Did It: Flying Chicken
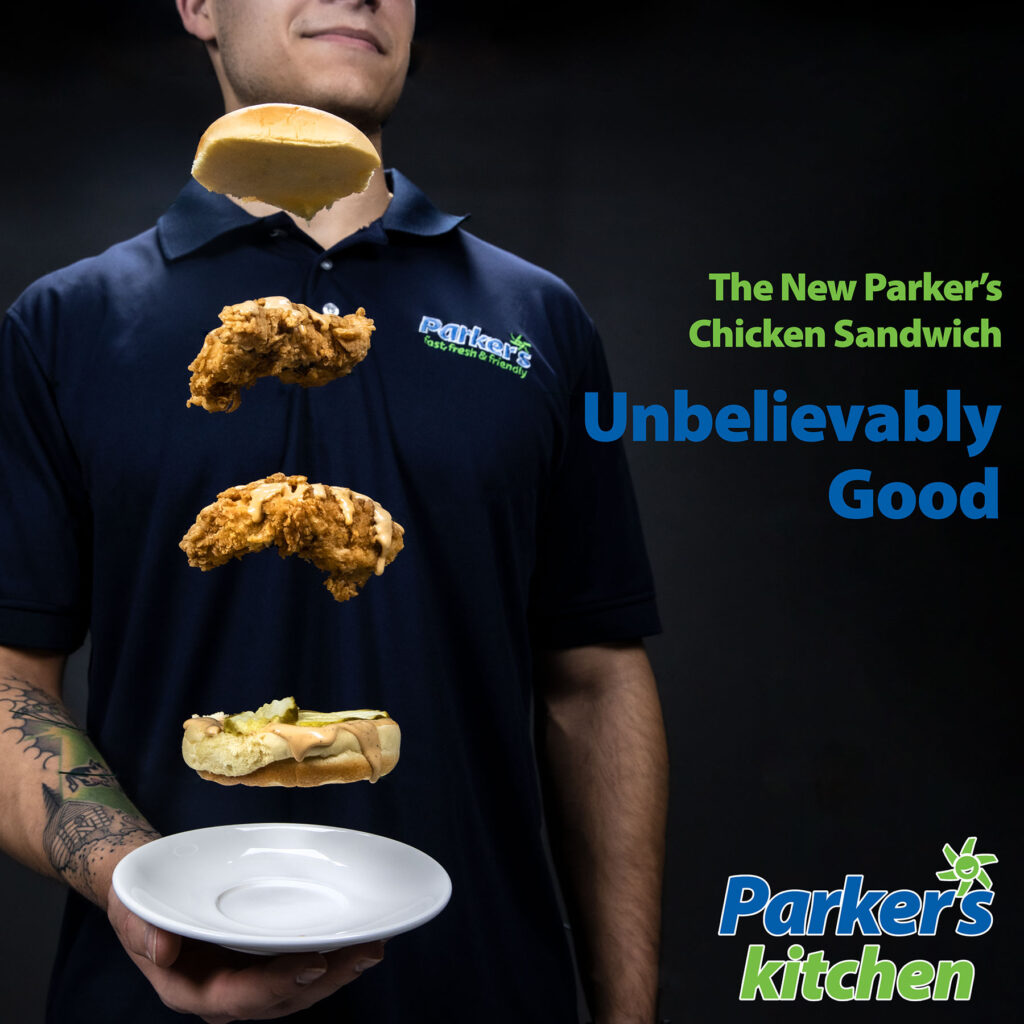
The Flying Chicken shot is one of our favorite things we’ve created recently. Our longtime client Parker’s is always thinking outside the box, which means we have to do the same. They love eye-catching and polished imagery, so they’re always challenging us to take our work to new heights.
So how did we pull this off?
The short answer is floral wire and Photoshop.
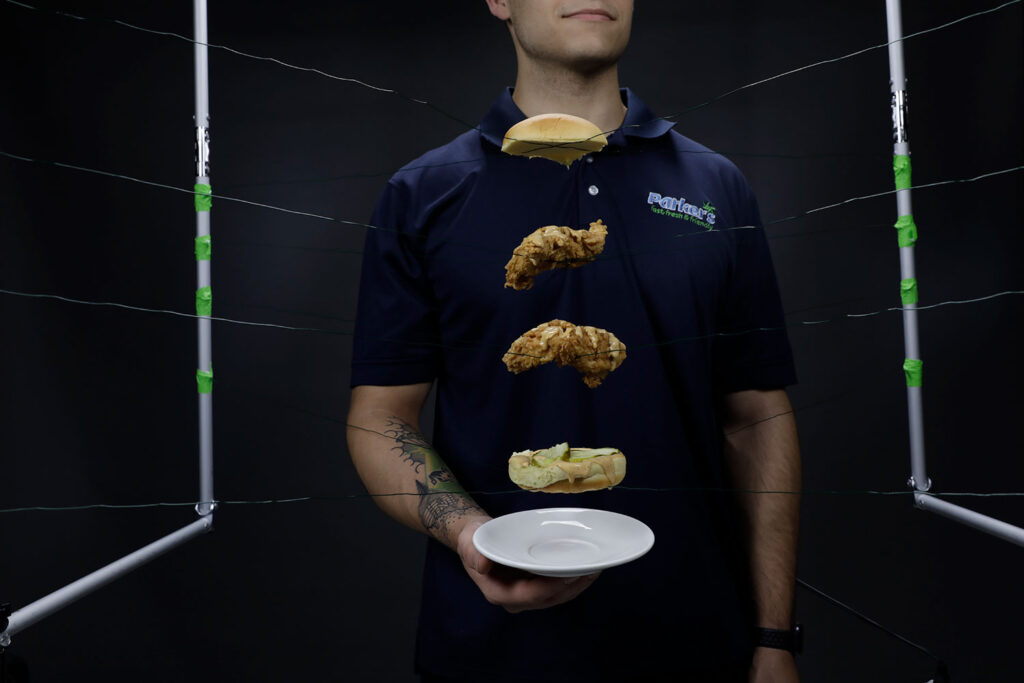
Here’s what the setup looked like:

Originally we had two light stands spaced apart and we tried stringing wire between the two points. That didn’t work because the tenders and buns kept tipping to the side.
Now what?
We pulled out two 4′ scrim frames and mounted those on the light stands. That allowed us to create X patterns with our floral wire. We marked off each level and built a spot for the wire to hold with gaffers tape. That gave us a wider base to rest the sandwich elements.
The tenders were a little difficult to display, so we ended up folding another piece of wire in half, stabbing each end through the top of the tenders, and twisting the wire onto the X wire to hold them in place.
We used two large soft boxes on each side, and another overhead to get the soft, even lighting needed for a shot like this.
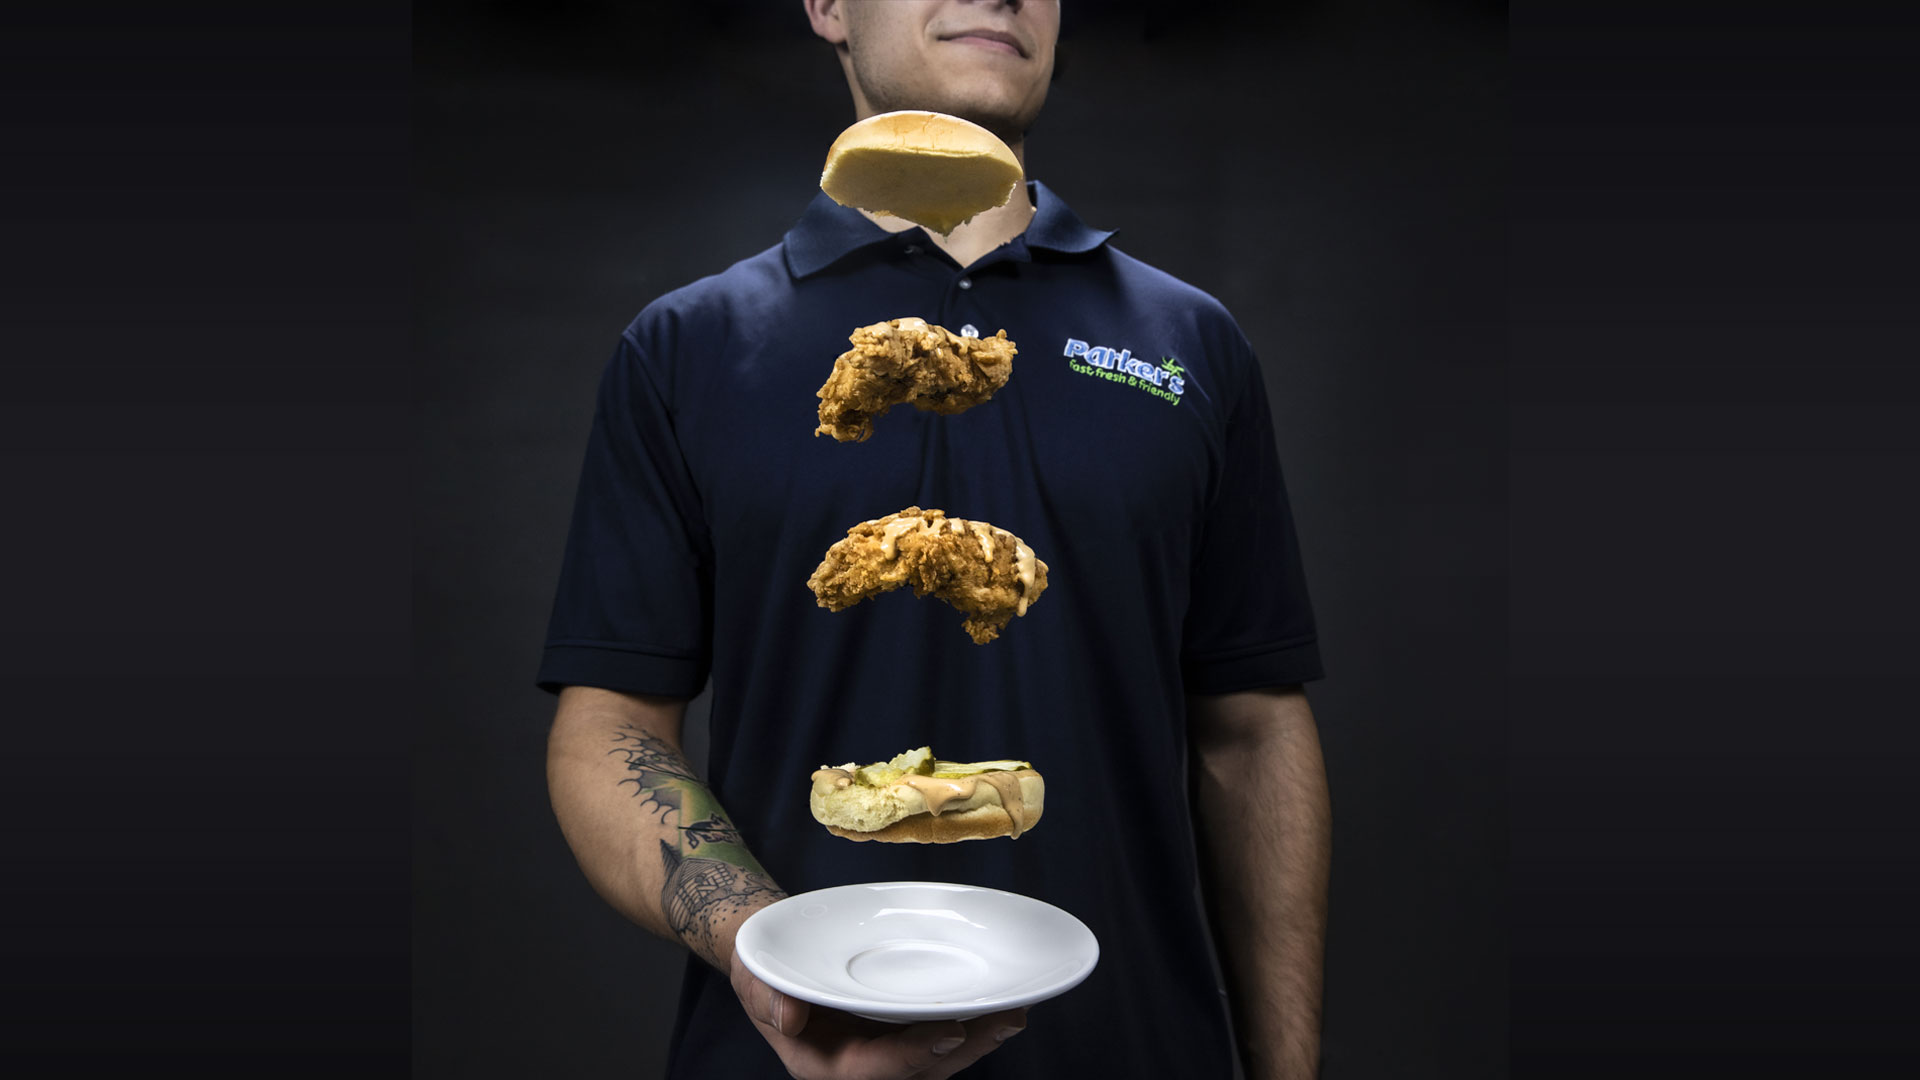
Our graphic designer, Noah, was our model.
After we got the shot, we had a considerable amount of photoshopping ahead of us. We used a combination of the patch tool, the healing brush tool, content aware, and a lot of cloning to get it just right.
From there we added some copy and Parker’s branding. This got a lot of attention online, and the client absolutely loved it.